October 30, 2015

Menu Plan Saturday #43


SUNDAY

MONDAY
This is a different recipe, but use Sunday's leftover Perfect Pot Roast for these sandwiches.  Serve on toasted buns with Provolone or Swiss cheese.


TUESDAY


WEDNESDAY

THURSDAY

FRIDAY
Use leftover ham from Tuesday's Chicken and bacon from Wednesday's Carbonara  


SATURDAY
Menu-Plan Day and Take-Out Night


FOR DESSERT
Apple Cinnamon White Cake


FOR A SNACK
This bread would go great with a lot of the dishes this week.

October 28, 2015

Easy Pretzel Toffee and Sally's Candy Addiction Cookbook Review


Please tell me you all follow Sally's Baking Addiction Blog???  This blog is one of the best.  Sally's writing draws you right in, her knowledge about baking and candy making is spot on and her photographs are gorgeous, vibrant and eye-catching.    

Her second cookbook, Sally's Candy Addiction, was recently released and I was lucky enough to receive a preview copy!  There is some serious goodness going on inside this book.  
Chocolate, Truffles, Caramel, Brittle, Toffee, Taffy, Fudge, Cakes, Cheesecake, Cookies and so much more.  Everything you could imagine is in this book.  Every recipe includes a large mouthwatering photo of these divine treats.

There is something for everyone's sweet tooth in this book.  There are simple recipes that require no candy-thermometer and there are more intermediate recipes that do require a candy-thermometer.  Even if you have never used a candy thermometer, Sally's instructions will help you learn and master the art of candy making.  She gives you tips on what will work and what won't work.  This girl knows her stuff.    
I opted for this Easy Pretzel Toffee simply because I had all the ingredients on hand.  This toffee was incredibly easy to make and the flavor is outstanding.  No candy-thermometer is needed and it comes together really quick.  It makes a giant pan and there is plenty to share with neighbors, friends and family.  My whole family loved it and they had no idea how easy it really was to make. 

Toffee bits on top of chocolate on top of toffee and pretzels.  

Some of the other recipes I can't wait to try are: 
Easy Vanilla Buttercreams
Mint Truffles
White Chocolate Macadamia Nut Toffee
Fluffernutter Swirl Fudge
Maple Walnut Fudge
Toffee Lover's Cupcakes
Easy Pretzel Toffee
from: Sally's Candy Addiction
(Printable Recipe) or (Printable with Picture)

8 oz. mini pretzel twists
1 c. (2 sticks) unsalted butter, plus more for greasing pan
1 c. dark brown sugar, packed
3 c. mini chocolate chips
2/3 c. Heath Milk Chocolate & Toffee Bits, optional

Grease a 12x17-inch pan very well with butter or line with a silicone baking mat. Do not line with parchment paper or aluminum foil.  Break up the pretzels into small pieces and spread them onto the prepared pan in a single layer.  The key is to use broken pretzels.  Set aside.

Preheat oven to 375 degrees.  Combine the butter and brown sugar in a medium-size saucepan over medium heat.  Stir constantly with a heatproof rubber spatula or wooden spoon until the butter has completely melted and the mixture is combined.  Without stirring, bring the mixture to a boil and allow to boil for 4 minutes.  Remove pan from the heat and pour toffee evenly over the pretzels.  Bake for 5 minutes.  Do not be alarmed by its appearance when it bakes; the caramel toffee mixture will bubble up and spread over the pan.

Remove from the oven and allow to cool for 3 minutes, then sprinkle with mini chocolate chips.  The heat from the toffee will begin melting the chips.  Using a rubber spatula or the back of a spoon, spread the melting chocolate chips into a layer over the toffee.  Immediately sprinkle with toffee bits, if using.  Refrigerate for 45 minutes to allow the chocolate and toffee to set.  

Once set, remove from the refrigerator.  Cut, using a sharp knife, or break into pieces as large or small as you want.  Makes 1 pound.    

Jenn's Notes: I used light brown sugar and one 12 oz. bag of mini chocolate chips.  The Milk Chocolate & Toffee Bits can be found down the baking aisle by the chocolate chips.


I received a copy of this cookbook from the Publisher for the purpose of this review, but all opinions expressed herein are my own. 

Linked up at Weekend Potluck!

October 25, 2015

Chocolate Orange Brownies


I got this recipe from one of my co-workers, the second I sunk my teeth into these divine three-layered brownies, I knew they had to be shared with all of you.

The brownie is soft and fudgy, the orange filling is so smooth and creamy and the chocolate topping is firm and kind of snaps when you bite it.  YUMMY!!!  These are great cold, but at room temperature, they melt in you mouth.  They are pretty rich, so a small square is plenty.  
They remind me of the holidays.  Do you love chocolate oranges?  These brownies have that same classic flavor.  The brownie is made with an entire can of chocolate syrup!!  You can find this rich chocolatey goodness by the ice cream toppings at your local grocery store.  If you aren't a fan of orange, you can always use a different flavored extract in place of orange.  I've tried a mint version and they are fabulous too.  


You might also like:
Chocolate Orange Brownies
adapted from: Allan P.
(Printable Recipe) or (Printable with Picture)

Brownie
1 c. all-purpose flour
1/2 c. unsalted butter, melted
1/2 tsp. salt
4 large eggs
1 tsp. vanilla
1 (16 oz.) can chocolate flavored syrup (find by the ice cream toppings)
1 c. sugar

Combine all ingredients in a large bowl and using a hand mixer, beat at medium speed for 3 minutes. Pour batter into a greased 9x13-inch baking pan.  Bake at 350 degrees for around 25 minutes.  The edges will pull away from the sides of the pan when brownie is done.  Cool completely.  

Filling
1/2 c. unsalted butter, softened
3 c. powdered sugar
1 1/2 Tbl. water
1/2 - 3/4 tsp. orange extract, to taste
pinch of salt
2-3 drops orange food coloring

Cream together butter and one cup of powdered sugar.  Mix in the orange extract, salt and orange food coloring.  Mix in remaining powdered sugar, one cup at at time, adding enough water as you go to make a smooth and creamy frosting.  Spread over cooled brownies.  

Topping
1 (12 oz.) pkg. chocolate chips (milk or semi-sweet)
9 Tbl. unsalted butter
1/2 tsp. orange extract

Melt chocolate chips and butter over low heat in a small saucepan.  Stir until mixture is smooth and creamy and stir in the orange extract.  Cool for 30 minutes or until lukewarm, stirring occasionally.  Spread over filling.  Chill before cutting into 20 bars.  

Jenn's Notes: I like a lot of filling.  If you would like a thinner layer, reduce powdered sugar to 2 cups and water to 3/4 - 1 Tablespoon. 


Linked up at Weekend Potluck!

October 18, 2015

Candy Corn M&M Funfetti Cookies


Soooooo, I made these cookies back in September and wanted to have them posted the first of October.  Umm . . . . it's October 18th . . . what the heck happened to October??? 

I loved these cookies.  Yes, they are pretty sweet, but you will still end up going back to the kitchen for one after another after another.  They are so good and buttery and rich.  The texture is the best, they are soft and chewy and the key is to not over-bake them.  I prefer them slightly under-baked.
I might have gone a little overboard with the sprinkles, but I wanted them to stand out.  If you are a little afraid of how colorful they are, you can always leave off the sprinkles or add a little less.

Check in the bakery section of your local grocery store for sprinkles.  There are several grocery stores around me that sell big containers of fun colorful sprinkles for pretty cheap.  There are always fun varieties for different holidays and you get about 3 times or so as many sprinkles as come in those little containers.

Have you ever had Candy Corn M&M's?  They taste like white chocolate M&M's to me and I thought they were great.  "The Mr." told me they tasted a little fruity to him.   Of course, regular M&M's would be great too.
Candy Corn M&M Funfetti Cookies
From: Jenn@eatcakefordinner
(Printable Recipe) or (Printable with Picture)

1 c. unsalted butter, room temperature
3/4 c. sugar
3/4 c. packed light brown sugar
2 large eggs
1 Tbl. vanilla
2 3/4 c. all-purpose flour
1 tsp. baking soda
1 tsp. salt
2 tsp. cornstarch
2 (8 oz.) bags Candy Corn M&M's
around 1/2 c. sprinkles

Cream together the butter, sugar and brown sugar until fluffy.  Add the eggs and the vanilla and mix until combined.  Add the flour, baking soda, salt and cornstarch and mix until combined.  Stir in one bag of M&M's.  Refrigerate dough for at least 20 minutes.  Preheat oven to 375 degrees.  

Scoop around 2 Tablespoons of cookie dough and roll into a ball.  Press a few more M&M's into the cookie dough and roll in the sprinkles, pressing into the dough ball slightly and place on a lightly greased cookie sheet.  Repeat.  Place around 9 dough balls per cookie sheet.  Bake for 8-9 minutes (I bake mine 8 minutes). Edges will be slightly browned.  Remove from oven, leave on cookie sheet for a few minutes, then transfer to a wire rack to cool completely.  Makes around 24-30 cookies.

Jenn's Notes: You can stir the sprinkles directly into the dough, but they won't stand out as much.  I wanted my cookies to be bright and colorful, so I rolled  the dough balls in the sprinkles.


October 14, 2015

Creamy Butternut Squash Mac and Cheese

I have been seeing butternut squash pasta dishes all over the place lately and I had to find out what was so good about this creamy sauce.

This was the first time I had ever tasted butternut squash.  I wasn't even sure what a butternut squash looked like and I had to "google" it while I was at the grocery store.  I picked the biggest one I could find (which ended up costing over $6 - wow) and of course I only ended up needing about 1/2 of it for my recipe.  So a medium-size butternut squash should be plenty big.  


Rather than going out to eat on Saturday night like we usually do, I decided to make this mac and cheese.  I was so surprised I REALLY LIKED this dish.  What even surprised me more, was that my Dad liked it.  He is pretty picky and when I took him a bowl, I told him to at least have one bite before I told him what it was made with.  He took a bite and said that's good and he even ate the entire bowl.  When I told him it was made with butternut squash, Greek yogurt and wheat noodles he said you couldn't even tell and it was creamy and cheesy.  

The sauce is thick and creamy and very very cheesy and I couldn't tell I used wheat noodles either.  I'm going to have to start buying those more often.  The broccoli was the perfect addition and I could have added even more.  The only thing I could think of changing is maybe adding a little onion next time, because I love onion in my mac and cheese.  There is plenty of cheese is this recipe, but it is loaded with some healthy stuff too.  I thought it was great and it even tastes just as good leftover.
Creamy Butternut Squash Mac and Cheese
slightly adapted from: Sally's Baking Addiction
(Printable Recipe) or (Printable with Picture)

4 c. peeled and cubed butternut squash
1 1/4 c. milk
1 1/4 c. low-sodium chicken broth
2 tsp. minced garlic
1 (13.25 oz.) box elbow wheat pasta 
2-3 c. fresh broccoli florets
1/2 - 3/4 c. Greek yogurt
salt and pepper, to taste
1 c. shredded Italian Cheese Blend
1 c. grated Parmesan or Asiago cheese
1/2 c. Panko bread crumbs
1/4 tsp. Johnny's Garlic Seasoning (or garlic powder)
1/2 tsp. dried parsley
butter spray, melted butter or cooking spray

Combine the squash, milk, chicken broth and garlic in a medium saucepan over medium-high heat.  Bring to a boil, reduce heat to medium and simmer until butternut squash is tender, about 15 minutes or so.  If you can easily mash the butternut squash with a fork, then it's ready.  Preheat oven to 375 degrees.  Cook the pasta according to package directions for al dente.  A few minutes before the pasta is done, add the broccoli florets to the boiling pasta water and cook for a few minutes.  Drain when done.    

Carefully pour the warm butternut squash mixture into a powerful blender or food processor.  Add the yogurt, salt and pepper.  Puree until mixture is completely smooth and combined.  Pour into a large bowl and mix in the cheese until melted.  Last, stir in the cooked and drained pasta and broccoli.  Pour creamy mixture into a lightly greased 9x13-inch baking pan.  

In a small bowl, combine bread crumbs, garlic seasoning and dried parsley and sprinkle evenly over the top of the pasta.  Spray top lightly with buttery spray, cooking spray or drizzle with a little melted butter.  Bake in preheated oven for 25-30 minutes or until bubbly.  Remove from oven and serve.  Serves: 6-8.   


October 11, 2015

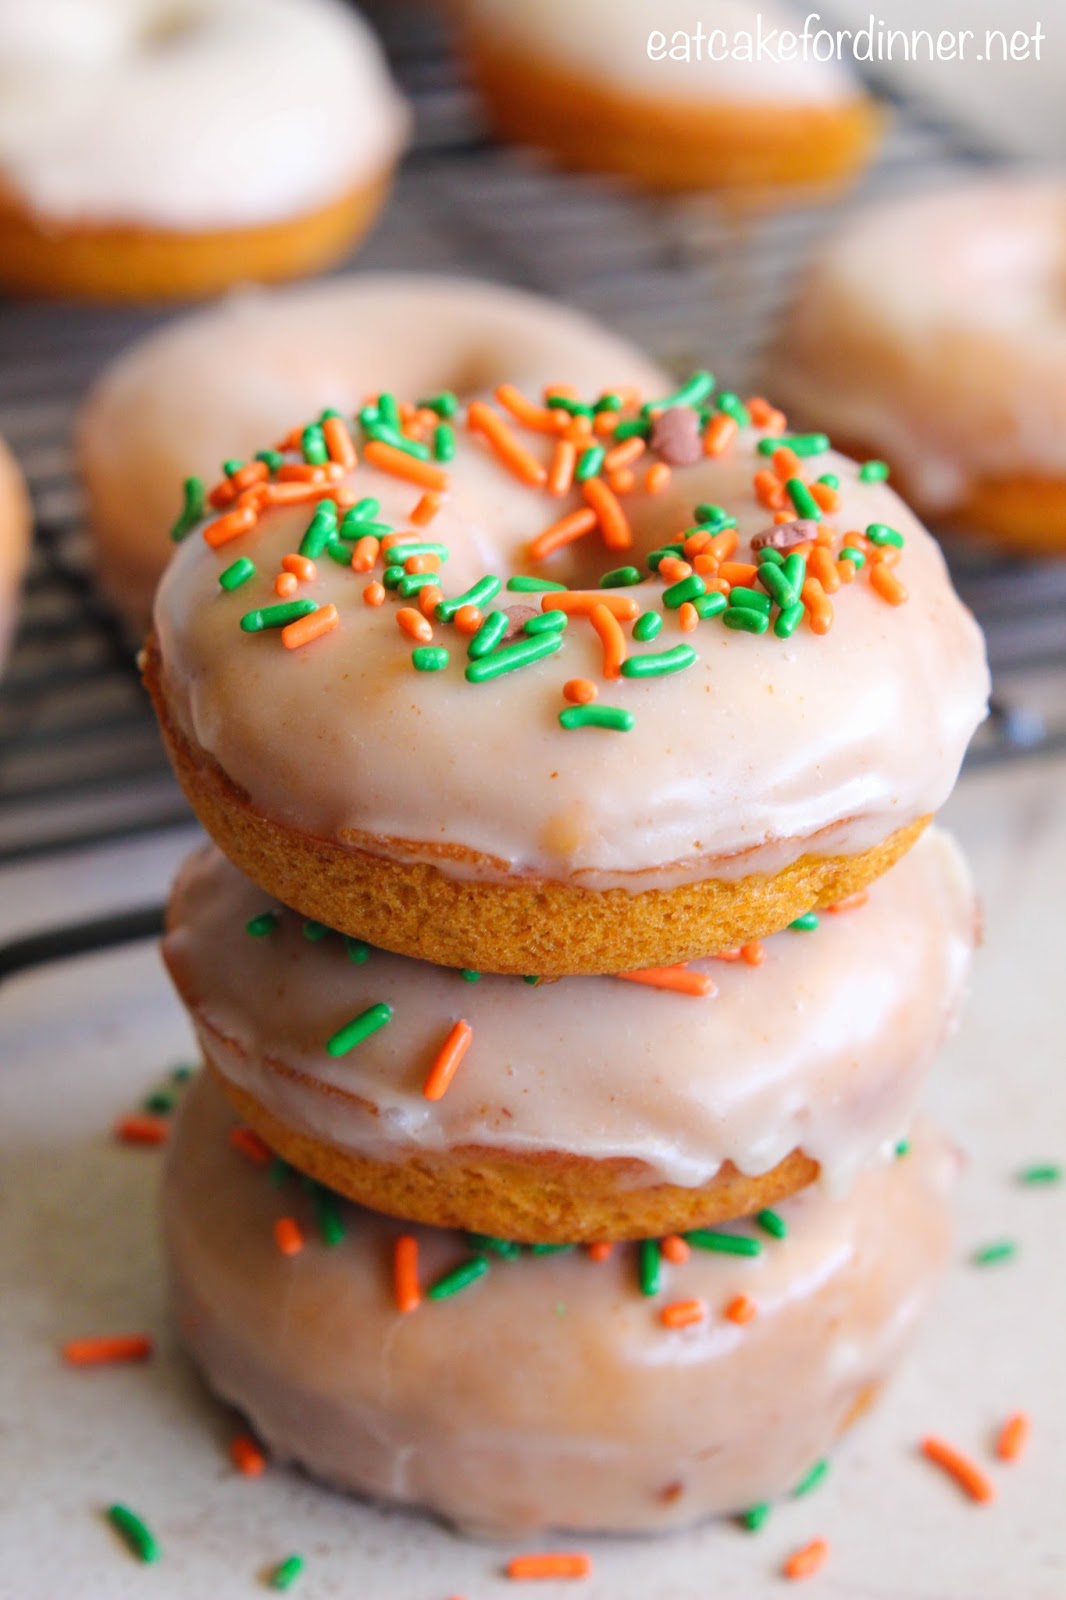
Baked Pumpkin Donuts with Brown Butter Glaze


Are you obsessed with all things pumpkin right now like me?  I think I have already gone through 4 or 5 cans and I have no plans of stopping anytime soon.

These donuts were one of the BEST.DECISIONS.EVER.  My family loved these donuts and went nuts over them.  They disappeared so fast and I was already getting asked to make another batch the same day.  The donut is so tender and moist and the brown butter glaze is rich and nutty and a perfect topping to this incredible donut.  I tried some donuts with a thick glaze and some with a thin glaze and both were good, but I preferred the thinner glaze.

If you want to make them extra cute and festive, top with some Fall sprinkles before the glaze hardens.  I made half with sprinkles and half without.
I had a sneaky little two year old in the kitchen this day!!!  I was snapping some pics when I see this little hand reach up, snatch a donut, take a bite, put it back and then pick off all the sprinkles :)  Don't those little hands just make you so happy :)  For the record, he said, "mmm ... dat good"
The donut is even more moist the 2nd day, but the glaze does get a little soft on day two, after being stored in an air-tight container.  

These are a must make this Holiday season.

I also shared this post over at THE RECIPE CRITIC'S SITE if you want to check it out!

You might also like:

Baked Pumpkin Donuts with Brown Butter Glaze
(Printable Recipe) or (Printable with Picture)

1/2 c. vegetable oil
3 large eggs
1 1/2 c. sugar
1 1/2 c. pumpkin puree
1 1/4 tsp. cinnamon
1/4 tsp. nutmeg
1/4 tsp. ground ginger
1 1/2 tsp. salt
1 1/2 tsp. baking powder
1 3/4 c. + 2 Tbl. all-purpose flour

Brown Butter Glaze
From: Jenn@eatcakefordinner
4 Tbl. unsalted butter
2 c. powdered sugar
1 tsp. vanilla
1-2 Tbl. milk, or more if needed

Preheat oven to 350 degrees.  Lightly grease a standard donut pan; set aside.  Beat the oil, eggs, sugar, pumpkin, spices, salt and baking powder until smooth and well combined.  Add the flour and stir until just combined.  Fill the wells of the donut pan 3/4 full, about 1/4 cup batter per donut.  Bake for 15 minutes or until a toothpick inserted in the center comes out clean.  Remove from oven, wait a few minutes and then use a toothpick to loosen and remove the donuts from the pan and place on a wire rack.  Repeat with remaining batter.  When donuts are cool, dip in the glaze.  Makes around 17 donuts.    

Brown Butter Glaze:  Melt the butter in a small saucepan over medium heat and heat until golden brown specks appear in the bottom of the pan, swirling the pan occasionally.  The butter will get foamy and if you swirl the pan around, you will see brown bits at the bottom and it will have a nutty smell.  Remove from heat and pour into a medium bowl, using a rubber scraper to get all the brown bits at the bottom.  Add the powdered sugar and vanilla and stir until smooth and well combined.  Add enough milk, as needed, to reach desired glaze consistency.  Dip tops of cooled donuts in glaze and set on a wire rack and allow glaze to harden.

Donut recipe adapted from: King Arthur Flour


LinkWithin